
How to Prepare Your Digital Artwork for the Perfect Print
- Grahame Case

- Dec 9, 2025
- 3 min read
At Have it Framed, we love bringing your digital creations to life.
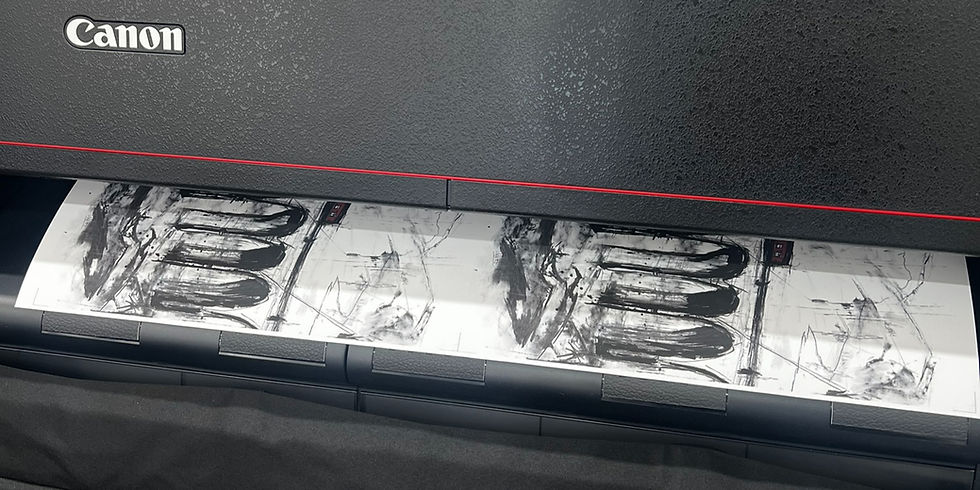
Whether you are a professional photographer, a digital artist, or simply someone looking to print a cherished family memory, we want your final piece to look breathtaking. To achieve this, we use the industry-leading Canon Pro-4100 printer paired with advanced Mirage printing software.
This combination allows us to produce prints with incredible detail, deep blacks, and vibrant colours. However, the quality of the final print relies heavily on the quality of the digital file you provide.
We’ve put together this comprehensive guide to help you prepare your files for the best possible results.
1. File Format: Why TIFF is King 👑
We often get asked, "What file type should I send?"
For the absolute best quality, we recommend saving your artwork as a TIFF (.tif) file.
Lossless Quality: Unlike JPEGs, which compress images and lose data every time they are saved, TIFFs are "lossless." They preserve every single detail of your work, acting like a perfect digital negative.
Settings: When saving as a TIFF, select LZW or ZIP compression to keep file sizes manageable without losing quality. Please also ensure your image is "flattened" (no layers).
A Note on Word Documents: Please do not send artwork inside a Microsoft Word (.docx), PowerPoint, or Publisher file. These programs automatically compress images, ruining the resolution and altering the colours. Always send us the original, separate image file.
2. Colour Space: Choose Adobe RGB (1998) 🎨
If you are digging into your colour settings, you might see options like sRGB, Adobe RGB, or CMYK.
For our Canon Pro-4100, the sweet spot is Adobe RGB (1998).
Wider Colour Range: sRGB is designed for computer screens and the web. Adobe RGB (1998) is designed for print. It contains a much wider "gamut" (range) of colours, particularly in vibrant greens, cyans, and blues.
Avoid CMYK: Our workflow is optimised for RGB. Sending a CMYK file can actually limit the colour range and result in duller tones.
3. Resolution: The Clarity Factor
To ensure your print is sharp and crisp when viewed up close, resolution is key.
The Minimum: We require a minimum of 300 DPI (Dots Per Inch) at the final print size. Anything less may result in pixelation or blurriness.
Go Bigger: While 300 DPI is the industry standard, our Mirage software is incredibly powerful. If you have the data, we encourage you to send files at 400 or even 600 DPI. This extra data allows our printer to render incredibly smooth tones and exceptionally fine details that standard resolution might miss.
Quick Math Check: For an A3 print (approx. 11.7 x 16.5 inches), your file should be at least 3510 x 4950 pixels.
4. 16-Bit: The Secret to Smooth Gradients
If your editing software (like Photoshop) gives you the choice between 8-bit and 16-bit, choose 16-bit.
8-bit: ~16 million colours.
16-bit: ~281 trillion colours.
Why does this matter? That massive increase in colour data prevents "banding"—those ugly, visible stripes you sometimes see in smooth gradients like a blue sky or a sunset. 16-bit files ensure those transitions remain silky smooth.
5. Don't Forget the Borders!
Do you picture your print having a clean white border around the image? If so, please add this directly to your digital file.
Including the border in the canvas size ensures that the margins are perfectly proportioned exactly how you want them. For example, if you want a 10x8" image with a 1-inch border, simply set your file canvas size to 12x10" and centre your image.
6. Guaranteed Quality: ArtSure Certification
For artists selling limited editions, or for anyone where longevity is paramount, we are proud to offer the Fine Art Trade Guild's ArtSure service.
This is a quality assurance scheme certifying that your print has been created using independently tested archival inks and papers. With ArtSure, you receive a Certificate of Authenticity and a unique registration number, adding tangible value and provenance to your artwork. Ask us about ArtSure when you place your order!
7. How to Send Your Files 🚀
High-quality TIFF files can be huge—often too big for standard email attachments.
Please use a secure, free file transfer service like WeTransfer or Smash. It’s easy:
Upload your file.
Set the recipient email to info@haveitframed.co.uk.
Include your name and order details in the message.
Ready to print? If you have any questions about preparing your files, just get in touch. We can't wait to see what you create!
Quick Checklist for Success
✅ Format: TIFF (Flattened)
✅ Colour: Adobe RGB (1998)
✅ Res: 300 DPI minimum (Higher is better!)
✅ Depth: 16-bit preferred
✅ Borders: Included in the file

Comments